Installing Creator Kit
Let’s create your first project using Creator Kit.
Starting with a template project
Step 1. Download the template project
Download the template project here.
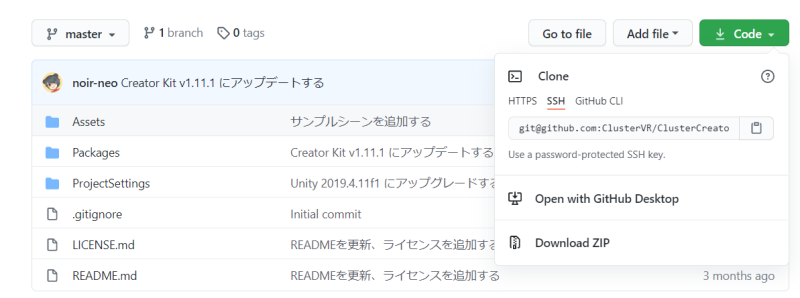
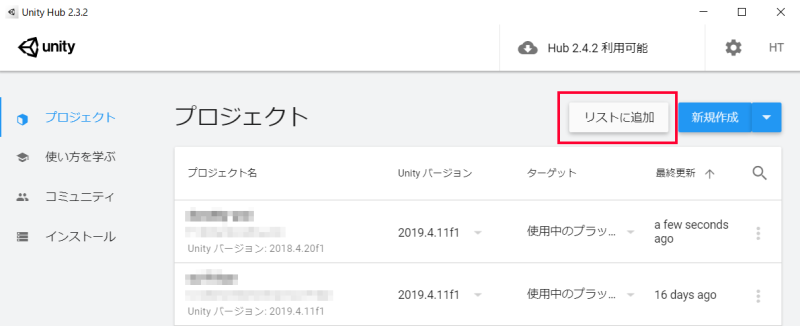
Step 2. Open the project
Extract the downloaded ZIP file. In Unity Hub, use “Add to List” to specify the extracted folder and add the project. By clicking the project in Unity Hub, you can start creating content.
Installing Creator Kit without using the template
Creator Kit can be installed using Unity’s Package Manager. The following explains how to add a Scoped Registry and install the latest package into your project.
Step 1. Open your project in Unity
Open an existing project or create a new project using a version of Unity supported by Creator Kit. When creating a new project, select “3D (Built-In Render Pipeline)” as the template.
Step 2. Add the Scoped Registry
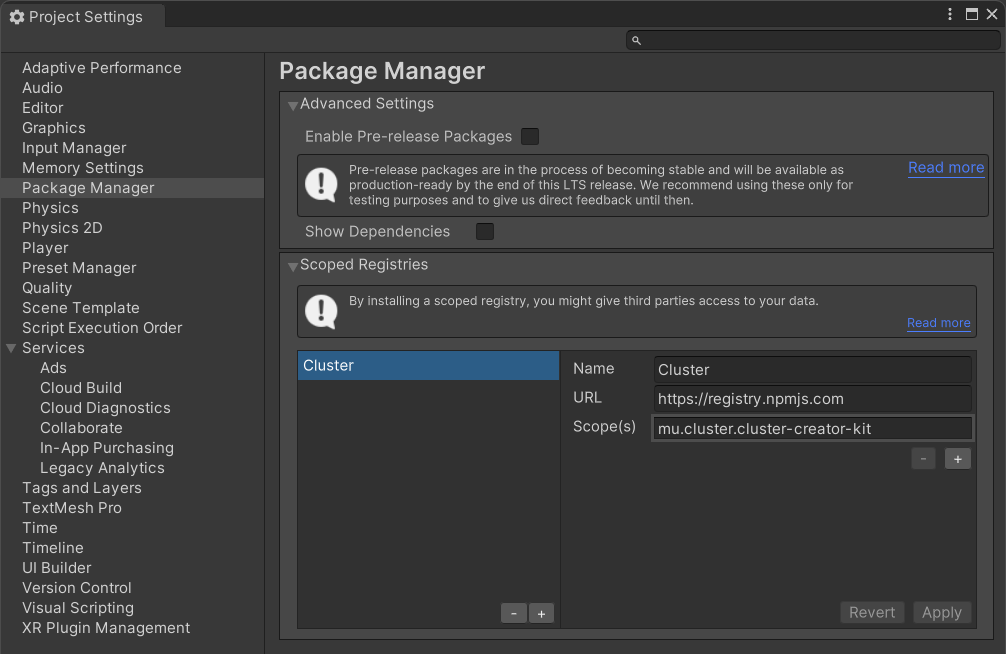
From Unity’s menu, go to Edit > Project Settings to open the “Project Settings” window.
In the left tab of the window, select “Package Manager” and add the following to the “Scoped Registries”:
| Item | Value |
|---|---|
| Name | Cluster |
| URL | https://registry.npmjs.com |
| Scope(s) | mu.cluster.cluster-creator-kit |
Finally, click the “Save” button to save the settings.
Step 3. Install the Creator Kit package via the Package Manager
From Unity’s menu, go to Window > Package Manager to open the “Package Manager” window.
Select “My Registries” from the dropdown at the top of the window.
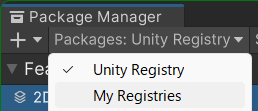
From the list, select Cluster, Inc. > Cluster Creator Kit and click the “Install” button to start the installation.
If “Cluster” is added to the Unity menu, the installation of Creator Kit is complete.
Step 4. Set up Project Settings
Go to Edit > Project Settings and configure each item as follows:
| Item | Value |
|---|---|
| Player > Other Settings > Rendering > Color Space | Linear |