Uploading a World
This article explains how to upload a world.
Upload procedure
This section explains the procedure for uploading a world created using the Unity Editor.
Step 1. Open the world (scene) you want to upload
If multiple Scenes are open in the Editor at the same time, only the active Scene will be uploaded as a world.
Step 2. Open the World Upload window
From the menu, select “Cluster > World Upload”.
Step 3. Log in to the cluster
You need a cluster account to upload a world. If you don’t have an account, please go to “New Registration”.
Click the “Issue token online” button in the “World Upload” window, or open the API access token page directly. Select “Create token” and copy the generated token.
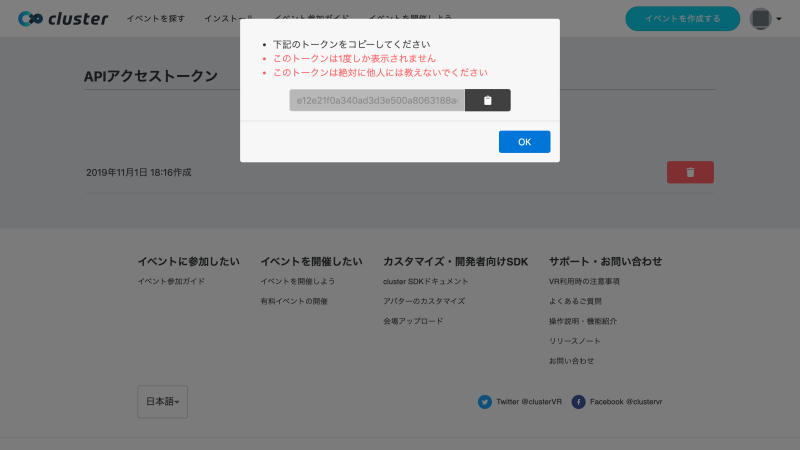
Return to the “World Upload” window and paste the token into the input field. Select “Use this token” and your login will be complete.
Your logged in user ID will be displayed.
Step 4. Add a new venue
Once you are logged in, select “World > Create New” from the “World Upload” window. A new world will be added, with nothing uploaded to it yet.
You can edit the “World Name,” “World Description,” and “Image” of the world you created. The settings you make here will be displayed in the world list and on the world page.
Step 5. Upload the world (scene)
If you select “Upload as ‘World name’”, a confirmation dialog will appear, so select “Upload”.
The upload process is divided into three stages: 1. World validation, 2. Switching and building for each platform, and 3. Uploading the artifacts. The processing time varies depending on the assets and worlds included in the project.
When each process item in the “World Upload” window displays “Success,” the world upload is complete.
This completes the world upload.
Upload for testing
Once you have uploaded a world, you can upload the world (scene) for testing.
Worlds uploaded for testing will not be reflected in regular spaces or events.
World creators can create test spaces.
The testing space will contain both worlds that you have uploaded normally and worlds that you have uploaded for testing purposes.
For information about testing spaces, please see the help page.
Following functions behave differently between test spaces and other spaces.
- In-world purchase
- Purchasable items are available without consuming Cluster Coin. By using the test space, you can verify the in-world purchase functionality without consuming any Cluster Coin.
- Status of owned purchasable items can be reset from the developer menu.
- For information on script behavior, see Cluster Creator Kit Script Reference.
When uploading a world for testing, you will need to select the devices available in your testing space.
The fewer devices you select, the faster your world will upload.